Summary
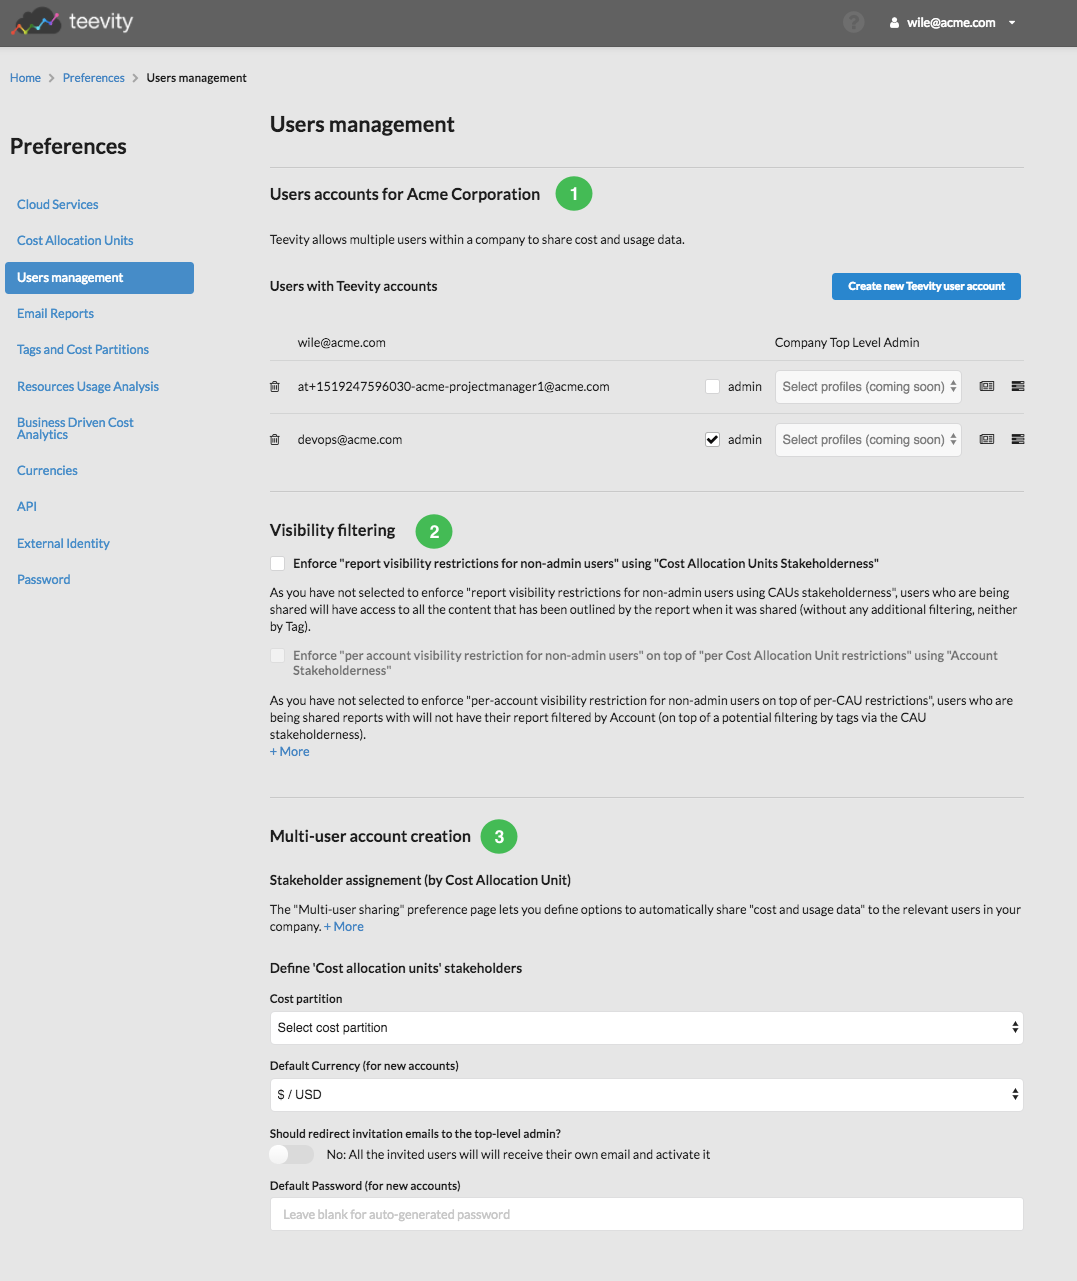
The users management page in the preferences section lets you:
- 1 create and remove Teevity accounts for your users
- 2 manage their permissions through a perimiter to access cost analysis reports and dashboards
- 3 do a bulk creation of accounts and set their cost allocation unit as perimeter
Users accounts
Manage your users
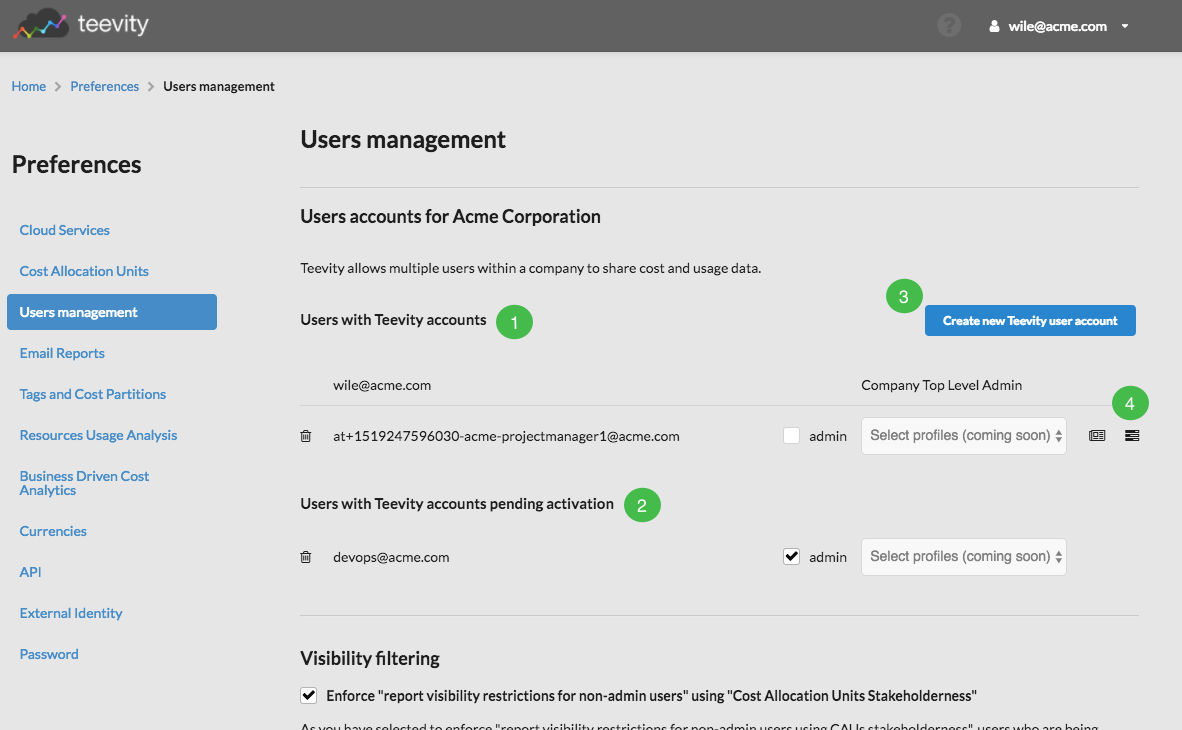
This first section is listing the existing users accounts including the one for the top level admin of your Teevity account 1. For each account:
- you can delete the account by clicking on the trash button located before the email address
- give the "admin" role by clicking the checkbox located after the email address
- choose a profile (feature coming soon)
- manage the attributes and cost perimeter permissions of the account 4. More details on this feature in the next section.
To create a new account, click on the button 3. You will be asked to enter the email address and if the user should have the "admin" role.
The user will get an email with a link to start using Teevity with his account.
You can also see the pending invitations that you sent 2
User roles in Teevity
There are 3 types of users in Teevity:
Company Top Level Administrator: That's the owner of the Teevity account.Administrator: the administrator can configure the cloud services, the cost partitions, the cost allocation units, the tags configuration etc. The administrator can also manage the users and their cost perimeter i.e. the visbility of the data they can access.Users: users can access the dashboards and reports shared by the administrator and inside their cost perimiter they can access the Dynamic Cost Explorer and create reports as well.
Log as a user
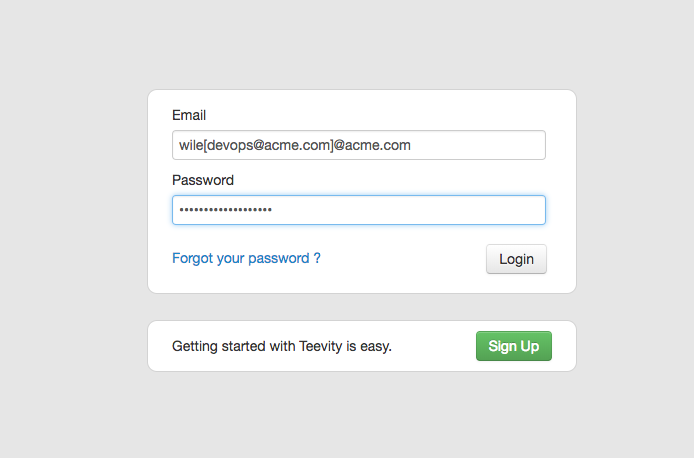
If you have the "Company Top Level Administrator" or "Administrator" role you can log in as a user to see what they can access in Teevity. You have to insert the email address of the user between brackets ([]) before the @. For example if you want to log in as devops@acme.com and your emaill address is wile@acme.com, then you will use wile[devops@acme.com]@acme.com as the user id on the log in page.
Cost perimiter of a user
Configuration of a cost perimeter
Please refer to this page to learn more about the cost perimeter of a user.
General options for the visibility of cost allocation units and cloud provider services
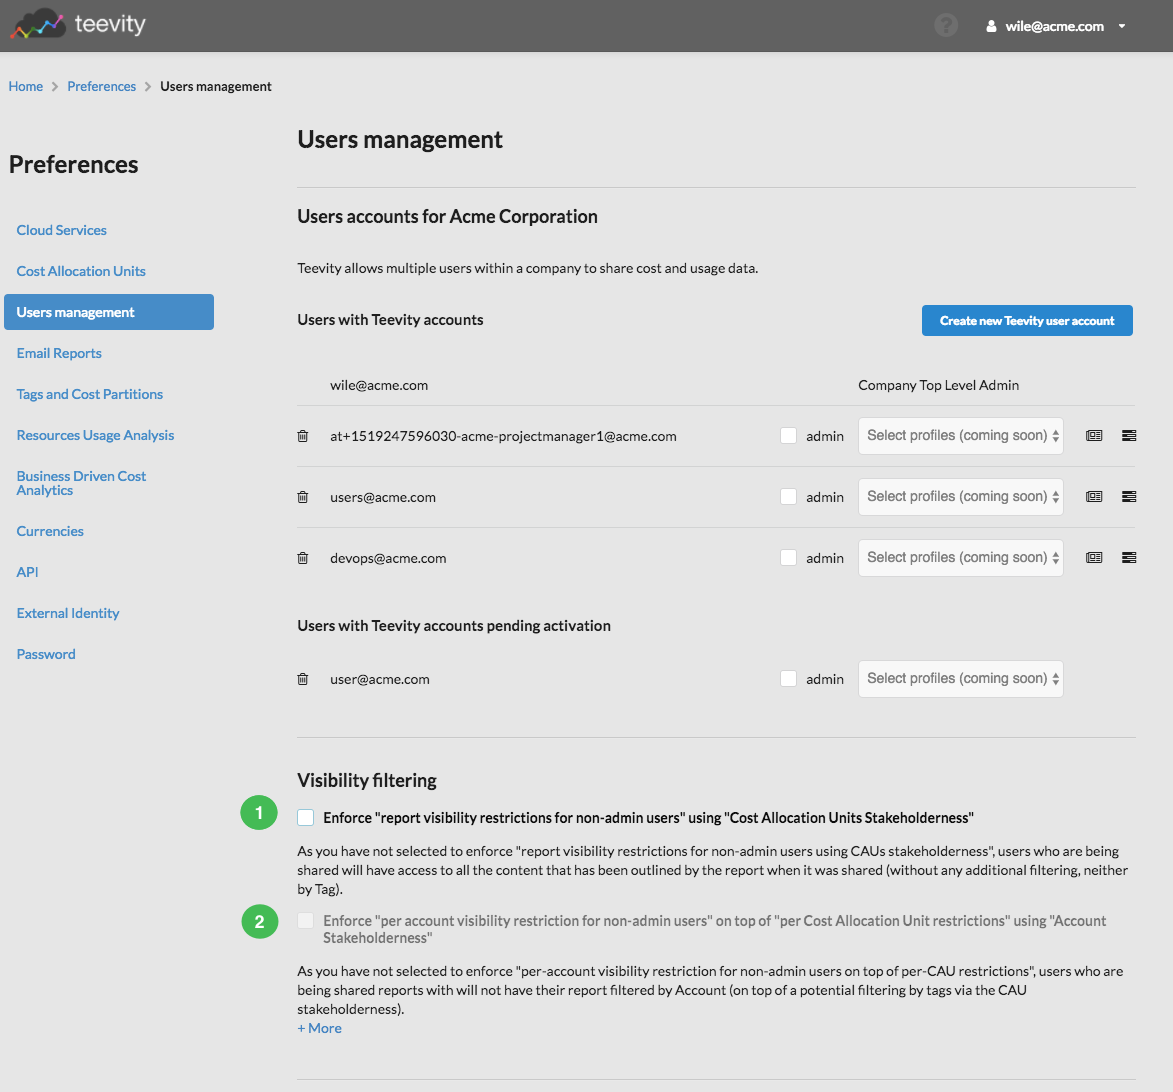
For the reports shared with a user and owner of a cost allocation unit, there's one option which is going to influence what he can see in the dynamic cost explorer for this report. In the users management page if you choose to enable the "Enforce the report visibility restrictions for non-admin users" using "Cost Allocation Units Stakeholderness" option 1 then the user will only see its cost allocation unit even if the reports perimeter includes others cost allocation units. If the option is not enabled then the report will include all the cost allocation units.
To continue with our user, if an admin shared with him a report called "Costs per project - last 3 months" which includes the cost allocation units Project A, B and C, then if the option is not enforced, our user will be be able to see Project A and B in the dynamic cost explorer :
Conversely, if the option is enabled then the dynamic cost explorer will only display the Project C:
When you enable this first option, you will have also the opportunity to enable a second visibility restriction 2 on top of the first one. This restriction concerns the visibility of the cloud services account.
In our example, if the user and owner of project C is only owner the account "teevity-test-project-id" then in the dynamic cost explorer, the filter for the accounts value will be restricted as well, the list of projects contains only one account instead of 3 in the previous screenshots:
Multi-user account creation
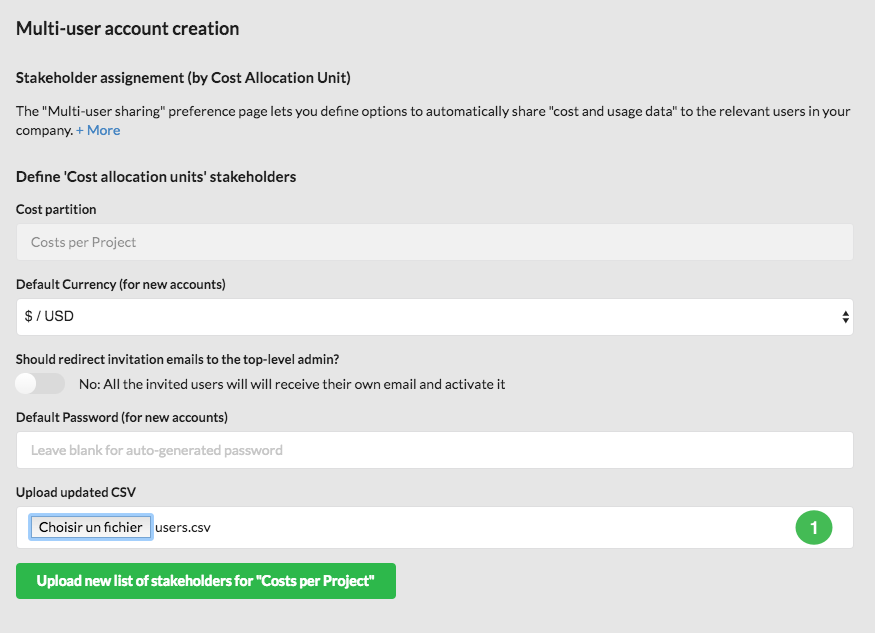
Instead of inviting users one by one, you can choose to send a bulk invitation and set their cost perimeter at the same time using a cost partition and its cost allocation units.
For example here we are going to use the "Costs per project" as the partition. Note that you can choose another currency for the users or to get the invitation by email so that you can send the invitation links by yourself at another time. Finally you can choose to let Teevity generate a password or set a default one.
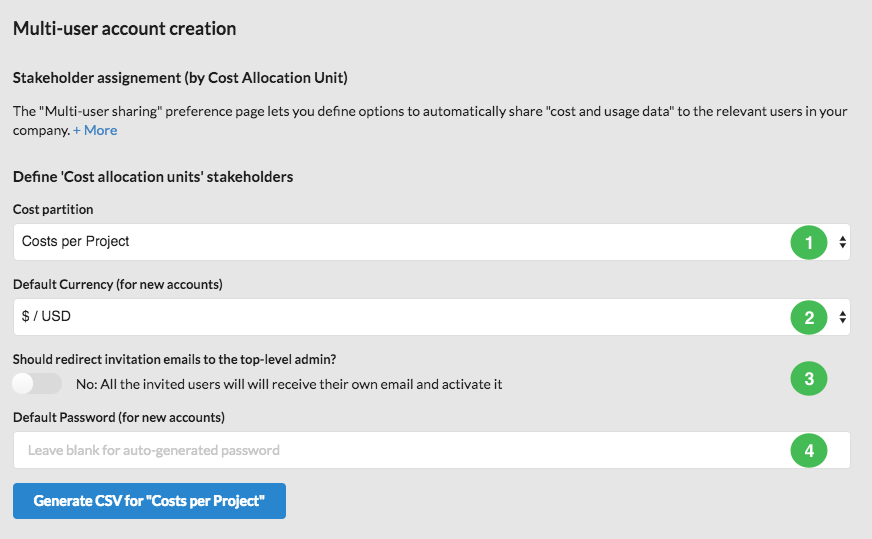
After clicking on the button "Generate (...)", a CSV file is downloaded by your browser. In it, you will specify for each cost allocation unit the list of email addresses (seperated by a ;) to invite.

When you are finished, return to the users management page and upload the file.
